System Restore disabled by your system administrator
When using Windows 11 or Windows 10 Home version, use the registry method, but on Windows 11 and Windows 10 Professional, you can use the Group Policy Method. Follow the methods as it suits
Using Registry EditorUsing Group Policy
If you are using Windows 11/10 Home and want to enable Group Policy, follow this method.
1] Using Registry Editor
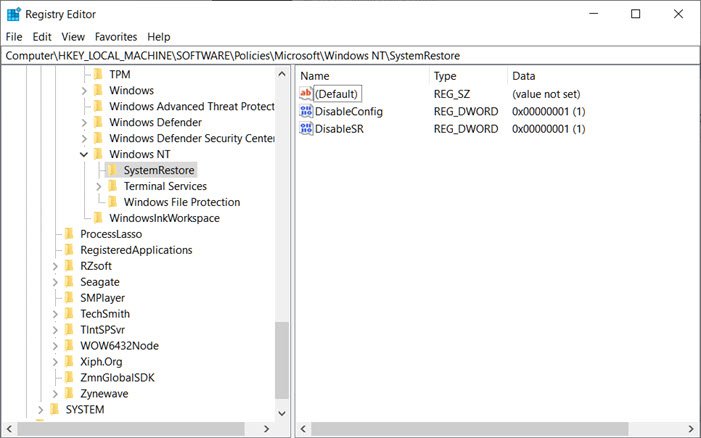
Open Run prompt (Win + R) and type Regedit, followed by pressing the Enter keyNavigate to the following path in the Registry Editor. You can copy-paste from below, and press Enter.
Delete the keys DisableConfig and DisableSR.
That’s it. Read: System Restore not working, failed, did not complete successfully.
2] Using Group Policy Editor
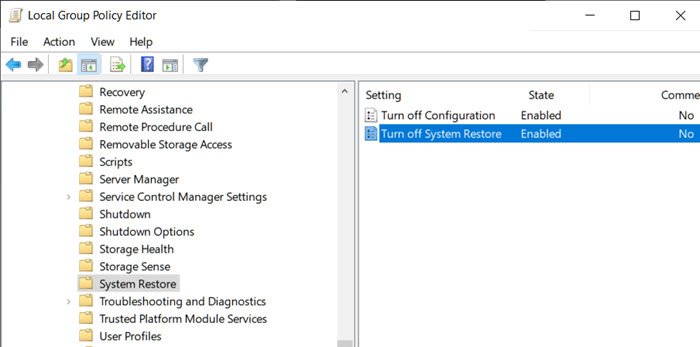
Type gpedit.msc in the Run prompt, and press the Enter key to open Group Policy EditorNavigate to the following:
Locate Turn Off System Restore setting.Double click on it and set it to Not configured or Disabled.Click on Apply and exit.Restart, and you will find the System Restore has been enabled.
You can make all these changes using an Administrative account or Admin password when prompted for it. Make sure to restart the computer for the restore to get enabled. Also, If System Restore is greyed out or the System Restore tab is missing, then you can fix using this method, or you can follow a more detailed guide. You can enable System Restore using PowerShell or make sure that it is enabled. I hope the post was easy to follow, and you were able to enable System Restore if your system administrator disabled it