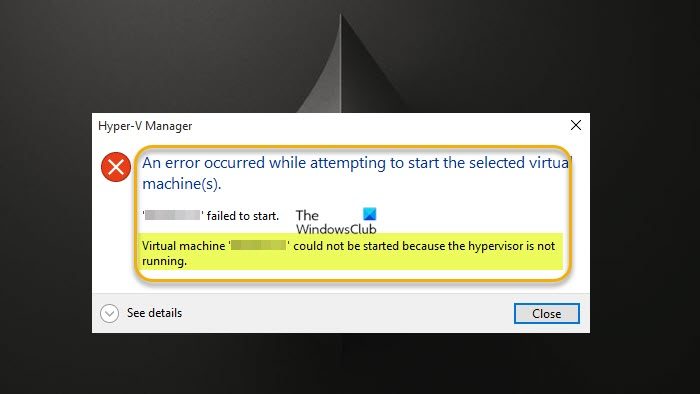
When this error occurs, you will receive the following full error message.
Read: Not enough memory in the system to start the virtual machine
Your hardware does not support virtualization features.BIOS is not set up correctly.You installed other incompatible hypervisors.Hyper-V is not installed completely.Hyper-V is not set up for self-boot.Hyper-V services are not running properly.
Virtual machine could not be started because the hypervisor is not running
If you get the Virtual machine could not be started because the hypervisor is not running when you try to start a Hyper-V enabled virtual machine on your host Windows 11/10 computer, then you can apply our suggested fixes listed below to have this issue resolved on your system. Let’s see the description of the applicability of these fixes. Before you proceed, we suggest you update your BIOS as an outdated BIOS might cause the hypervisor not running issue. An update (if available) might fix the issue. If you need to know the motherboard manufacturer, go to its official website to know the information about the motherboard. Some manufacturers offer BIOS-flashing options directly in BIOS which is much simpler to update BIOS than the usual way. In addition, make sure Windows is updated to the latest version/build on the machine.
1] Verify if Virtualization is Enabled in BIOS
Virtualization feature is necessary for the use of hypervisor so you should make sure hardware virtualization is enabled in BIOS by following these steps:
Reboot your computer and enter BIOS.Navigate to CPU Configuration.Enter Acceleration Section.Find the following options if available and enable them:VT-xAMD-VSVMVanderpoolIntel VT-DAMD IOMMUOnce done, exit the menu and click save changes.
Read: Virtualization support is disabled in the firmware in Windows
2] Verify your CPU is SLAT compatible
Based on user experience and reports, if your CPU is not SLAT capable, your computer may not support built-in virtualization hence the Virtual machine could not be started because the hypervisor is not running error. In this case, you need to check whether your CPU is compatible with the SLAT (Second Level Address Translation). You need to visit your CPU manufacturer’s website for specific details or use third-party software. If you confirm that your CPU is SLAT compatible, then you can follow the instructions in this guide to enable the feature on your computer.
3] Check the Hyper-V Virtual Machine Management service
This solution requires you to check (and restart) if the Hyper-V VMM service is running properly and set to Automatic Startup type in Windows Services Manager. Do the following:
Press Windows key + R to invoke the Run dialog.In the Run dialog box, type services.msc and hit Enter to open Services.In the Services window, scroll and locate the Hyper-V Virtual Machine Management service.Double-click on the entry to edit its properties.In the properties window, click the drop-down on the Startup type and select Automatic.Next, make sure the service is started.Click Apply > OK to save changes.Restart the machine.
Read: The Virtual Machine Management service encountered an error while configuring the hard disk
4] Configure Hyper-V hypervisor to launch automatically
If you have not set the Hyper-V hypervisor to start automatically after boot, you’re likely to encounter the error at hand. In this case, to reconfigure the setting in the boot data file, you can run the command below in the command prompt elevated mode. Read: No hypervisor was found; Error 0xc0351000 – Windows Sandbox
5] Uninstall other incompatible hypervisors (if applicable)
The error you’re currently facing can occur if you have other hypervisors from third-party vendors installed on your Hyper-V host machine. Hyper-V is not compatible with other hypervisors such as VMware Workstation or VirtualBox. In this case, to resolve this issue, you simply need to uninstall these incompatible hypervisors. Or you can switch entirely to other virtualization platforms like VMware.
6] Reinstall Hyper-V
This solution requires you to reinstall Hyper-V on your Windows 11/10 host machine. Essentially, you just need to disable Hyper-V in the Windows Features panel, restart your computer and re-enable Hyper-V. Your VMs will be kept in Hyper-V Manager during the reinstall procedure. After you must have successfully created a VM in Hyper-V, restart your computer. Read: Hyper-V encountered an error while loading the virtual machine configuration. I hope this helps! Now read: Error 0x80370102 The Virtual machine could not be started because a required feature is not installed
Can you run a VM without a hypervisor?
It’s not possible to create/run a virtual machine without one. A hypervisor, also known as a virtual machine monitor (VMM), isolates the hypervisor operating system and resources from the virtual machines and enables the creation and management of those VMs by dividing up the hardware resources such as memory, CPU power, and network bandwidth which it allocates these resources to each VM. There are two main hypervisor types viz: Type 1 (or bare metal) and Type 2 (or hosted).
How do I know if my hypervisor is running?
Open the Hyper-V-Hypervisor event log in Event Viewer. In the navigation pane, expand Applications and Services Logs > Microsoft > Windows > Hyper-V-Hypervisor, and then click Operational. All hypervisors need some operating system-level components to run VMs—such as a memory manager, process scheduler, input/output (I/O) stack, device drivers, security manager, network stack, etcetera. And if you’re wondering, virtual machines are files that recreate the computing environment of a physical computer, and a hypervisor is a software that runs these files. Read: Fix No operating system was loaded error in Hyper-V.

