Fix Microsoft Store Error Code 0x80070422
In this article, we will show you how you can troubleshoot the issue and solve the problem. My thanks to Anand Khanse, MVP, for suggesting several of the following troubleshooting steps.
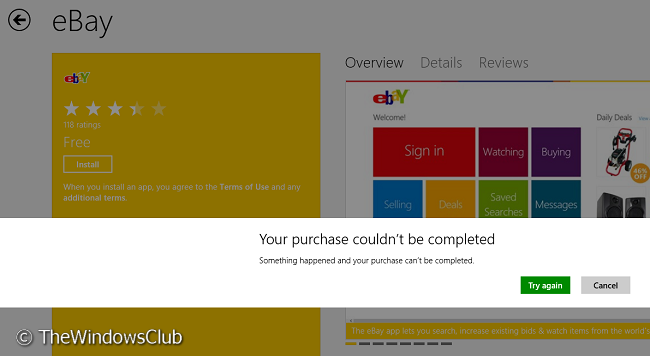
Your purchase couldn’t be completed, Microsoft Store Error 0x80070422
Many users face the “Your purchase couldn’t be completed” error, while sometimes users may even receive additionally, an error code like 0x80070422. This error is received for free as well as for paid apps. However, these kinds of errors need similar treatment. You do not need to carry out all these suggestions. Just see which one helps you.
First of all make sure you have set the correct region, time, and date. Change the settings if required.Run System File Checker to verify the integrity of your system files. Reboot.Next, clear the app cache and see if this helps.Moving on, you could run the Windows App Troubleshooter and Windows Update Troubleshooter to see if it helps you. This will fix issues concerning resolution, drivers, Windows Update issues, etc.
Having done these basics, you could move on and see if any of these fixes help you:
1] Switch to local account from Microsoft account or vice versa
Press Windows Key + I on desktop, go to your user account, click Switch to a local account. That’s it. Reboot and your problem should be fixed now.
2] Restart Windows Updates
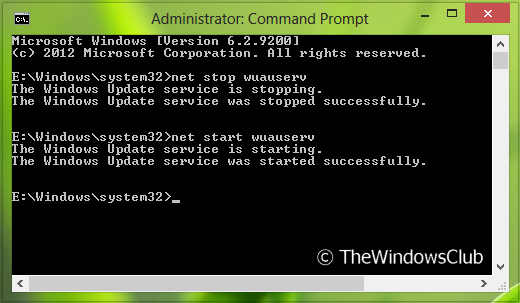
Press Windows Key + Q, type cmd. Pick Command Prompt from search results. Right-click on Command Prompt, from bottom options, select Run as administrator.
Now run these command one by one: Reboot once, you might not experience the issue again. If you still face the issue then try the next suggestion.
3] Ensure that the Windows Update service is set to start automatically
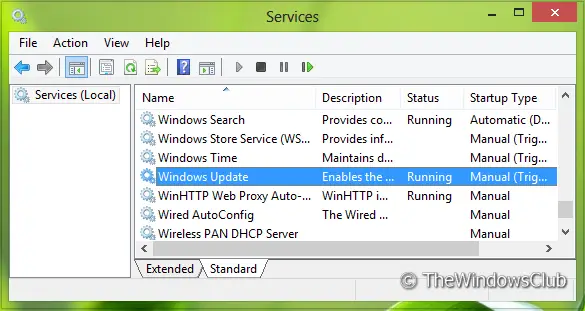
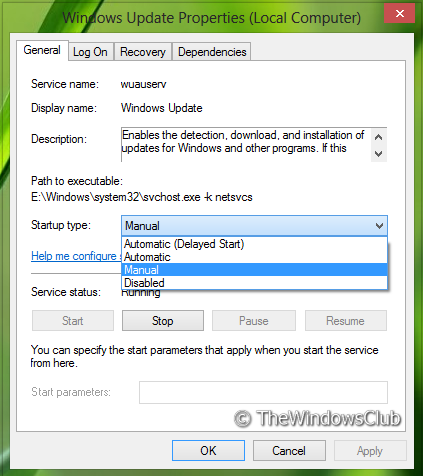
By default, the Windows Update service is set to start automatically. But if you have changed some settings, you could reset Windows Update setting back to its default via the Control Panel or carry out the following steps: Press Windows Key + R , type services.msc in the Run dialog box. Click OK. From the Services window, look for Windows Update service, since you’re facing the issue, it may have Disabled or Manual Startup type.
Double click on the same service to modify its Startup type. Select Automatic from the drop-down list as shown. Click Apply followed by OK.
Now reboot. Hopefully, you’ll no longer encounter the issue. Do let us know if this post helps you and if so which solution helped you. These posts may also interest you:


